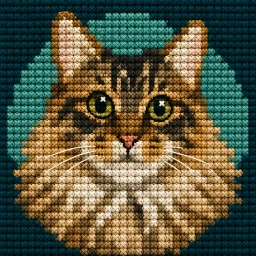

Quick answer: Choose a photo with a clear subject, crop it to the final composition, set your finished size and fabric count, limit the number of colors, then inspect the symbol chart before you buy thread or begin stitching.
1. Start with a photo that will survive simplification
Cross stitch turns continuous color into a grid. Strong silhouettes, clear facial features, and separation between the subject and background survive that translation best. A bright, detailed photo is useful, but detail should support the subject rather than compete with it.
- Prefer a sharp subject with recognizable edges.
- Avoid very small faces or important details near the edge of the frame.
- Use enough contrast that light and dark areas remain distinct after the palette is reduced.
- If the background is busy, plan to crop tightly or remove it.
2. Crop for the piece you want to make
Decide whether the project should be rectangular, square, or round before adjusting colors. Cropping changes which colors matter and where the eye lands. For portraits, keep breathing room around the face. For pets or objects, a round crop can create a finished medallion-like composition.
Skeina can also isolate the main subject. That leaves unstitched fabric around it and often reduces the number of background stitches, colors, and skeins.
3. Choose finished size and Aida count together
Finished dimensions and fabric count determine the stitch grid. A larger physical piece or a higher fabric count allows more stitches across the photo, which can preserve finer detail. A smaller grid is faster and often reads more cleanly from a distance.
For example, a 20 cm wide design on 14-count Aida is roughly 110 stitches wide. See the pattern size and Aida count guide for the formula and planning examples.
4. Set a practical DMC color limit
More colors can preserve subtle shading, but each extra color adds thread changes and materials. Start with fewer colors than the maximum and add detail only where the preview genuinely improves. For a first photo pattern, a compact palette is usually easier to organize and stitch.
Skeina matches the result to real DMC thread numbers. You can use a curated palette, let the app choose from the full palette, or select only colors you already own.
5. Inspect colors and symbols before committing
Look at the color preview for the overall image, then switch to symbols or the combined view. Check that adjacent colors remain distinguishable, important contours are intact, and isolated one-stitch patches do not make the design unnecessarily noisy.
Use the legend as a reality check
The legend shows how many stitches use each color and estimates the thread length and number of skeins. A color used for only a handful of stitches may not earn its place unless it carries an important highlight or edge.
6. Stitch on screen or export the PDF
On screen, zoom into the working area, see the colors currently visible, and mark squares as complete. If you prefer paper, export an A4 or US Letter PDF with tiled chart pages and a full thread legend.
A simple quality checklist
- The subject is recognizable at a glance.
- The finished dimensions match your intended frame or hoop.
- The color count feels manageable.
- Important neighboring colors have distinct symbols.
- The estimated thread list matches how you plan to stitch.
Once those points look right, save the pattern and begin with confidence. Skeina keeps the pattern, chart position, and marked progress together for your next session.